Getting Prepared
The following are posts on preparedness, compiled into a single page. Be aware that this page will change as new posts in the blog may be added into this page.
Preparedness
The National Center for Disaster Preparedness at Columbia University found through a 2015 study that two-thirds of Americans are not prepared for an emergency. The center’s director, Irwin Redlener, thinks the actual numbers are far lower. At presentations to groups of emergency preparedness specialists he’ll ask how many have personal or family emergency plans. Of the few who raise their hands, most of those have “half-baked” plans. (Will growing scenes of hurricanes, wildfires and volcanoes make us a go-bag people?)

Why Aren't More People Better Prepared?
Where We're Going With Preparedness
- Shelter in place and evacuations,
- Home preparations,
- Work preparations,
- School considerations,
- Communications
- Emergency plans.
Preparations
Shelter in Place
When I’m faced with an emergency, I hope it’s a shelter-in-place situation, and that the place is my home. In a shelter-in-place you stay put until conditions are safe to leave.
During the COVID-19 pandemic, especially during the first few months of government mandated "stay home" orders or mandates, much of the country experienced a limited form of shelter-in-place. But there is a difference between the stay at home orders and what would be experienced in a true shelter-in-place order or restriction.
Shelter in Place - Home is Ideal
The most common shelter-in-place restriction is because of a temporary condition, such as a hazardous situation (hazardous material leak/spill), or an active shooter in the area.
If emergency management does not anticipate hazardous conditions by remaining in your home, you may be advised to shelter-in-place. In the rare instance people are told to go to their homes and shelter in place.
This restriction can also happen in places other than your home. In the active shooter example, law enforcement may instruct all those in the affected area to remain in a lock-down state, which is effectively sheltering-in-place.
In most cases the shelter in place order is generally a very temporary, hours at most, condition. At most it's a minor inconvenience to a normal schedule.
However, what if there were a hazardous materials condition that warranted a restriction to remain indoors at your place of employment, or school, for a day or longer? What preparations do you have to shelter-in-place?
While I don’t expect a shelter-in-place restriction of any considerable length of time when I am at work, I do have some emergency items on hand. In addition to my get-home kit I keep in my backpack, I have additional emergency food and water bottles in a drawer.
Shelter in Place vs Stay at Home
In the case of COVID-19, the stay-at-home orders were similar to, but not the same as, shelter-in-place.
First, the stay-at-home orders ended up being for weeks. Often shelter-in-place orders don't last as long.
Second, the stay-at-home orders generally did not restrict your ability to go to the store, work, or to do other "essential" things. Shelter-in-place restrictions are for you to remain where you are at during the emergency. In a situation like an active shooter or hazmat spill, the order is to keep you safe from directly encountering the threat.
However, in a natural disaster shelter-in-place order stores won't likely be open or even accessible.
Think of a shelter-in-place order as you needing to be self-sufficient where you are at for the length of time of the restriction.
Another factor in some shelter-in-place orders may be the need to perform additional precautions to protect yourself and others. For example, in the event of a chemical, biological, radiological, or nuclear (CBRN) incident there are additional procedures that may be needed to increase your protection. Besides locking doors and windows, sealing windows and doors, possibly turn off any venting system that brings outside air indoors. There may also be a safe room/location that offers better shelter-in-place options.

Shelter in Place vs Lockdown
Evacuation
Some might consider an evacuation a “bug-out” situation. Personally, I consider a "bug-out" as leaving without an intent to return, at least not for a while. I think the most likely "bug out" would be assuming a breakdown in society, where you want to leave before things get bad, or before bad becomes worse.
While an earthquake or other serious emergency could potentially lead to such a break down in society, the evacuation to be discussed is assuming you will be able to return to your home when it is safe to do so. In other words, the evacuation is expected to be temporary.
For me, I generally consider a bug-out as completely voluntary (meaning the government is not going to tell you to “bug out”) where an evacuation is usually advised or mandated by the local government, emergency management, or law enforcement.
Evacuation - Best On Your Terms
If an evacuation is expected, it is much better for you and your family to evacuate when, and to where, you choose. Being forced to evacuate quickly limits what supplies you can take. Being required to evacuate to a specified location also limits what resources you can bring, what you can do, and it subjects you and your family to the requirements of the evacuation facility.
As for the evacuation, it’s much better to be prepared to leave and go where you can be more comfortable. This is also an important consideration if you have pets you don’t want to end up at an animal shelter.
You should also be aware that most emergency or evacuation shelters/centers/facilities do not allow pets. This is for the health and safety of those in the shelter as well as for the animal. Pets brought to the center are usually taken to a designated animal shelter.
Evacuations are not my first choice of action, unless there is a clear threat that endangers life by remaining in place.
If an evacuation is recommended or ordered, it’s best to leave as quickly as possible. Delays in leaving will make it more difficult to leave as roads will get more crowded. Few communities have good evacuation plans, and, in most places, evacuations can become messy, chaotic, and are poorly managed and coordinated. The last thing I want is to be stuck on a road for hours (or days) trying to evacuate to safety.
If there is a very real threat, and I have ample notice, I would want to leave as quickly as possible. The longer the delay in leaving, the harder it will become to actually evacuate. This is where advance preparation and planning is vital.
There are two general categories of evacuation: voluntary and mandatory. These are exactly as the names imply. There may be more "official" names, but I find these more descriptive and useful.
Voluntary Evacuation
Under a voluntary evacuation, residents are advised to evacuate, but there is no legal requirement to do so. You need to evaluate your own condition, preparedness, and other factors to determine if evacuating is the better option.
If you need to evacuate, this is the preferred way as you can usually leave when you want to, though it's best to not wait especially if you think it might become a mandatory evacuation.
Mandatory Evacuation
A mandatory evacuation means you are required to evacuate. Whether or not you choose to do so is still your choice. While law enforcement could become involved, the reality is lives are at risk by staying and there probably won’t be any help if the situation worsens. The safety of you and those in your care should be your primary goal. This is ultimately the reason for being prepared, to get you safely through an unexpected situation.
In recent years officials have become more cautious about issuing mandatory evacuations, except for specific locations that are immediately threatened by an emergency or disaster situation. The logistics and time it takes to evacuate a large population can actually endanger more people than allowing those not in the area of immediate threat to shelter-in-place. Issuing a recommended, or advised, evacuation notice to the surrounding areas that may be threatened provides a warning but leaves the choice up to those in the area.
Your preparation planning should identify evacuation options, including primary and alternative routes leaving the area, and where you will be evacuating to. Ideally, you’ll have another place you can go to, such as a relative or friends home a few hours from the danger zone.
Mandatory and voluntary evacuations can further be categorized as either a rapid (emergency) or noticed evacuation.

Rapid Evacuation
Under a rapid evacuation you are basically told to leave, and to leave now. Maybe winds shifted and a wildfire is suddenly consuming your neighbor’s house and threatening yours. Maybe a dam broke and the flood is on its way. Rapid evacuations are usually mandatory as there is substantial threat of injury or death.
I read a very direct warning to evacuate that occurred when Hurricane Harvey was threatening one area in Texas. KSBW-8 reported emergency management officials in Tyler County, in east Texas, warning of “imminent and deadly flooding” and “residents near the area must evacuate immediately” (East Texas county tells residents 'GET OUT OR DIE!'). Tyler County Judge Jacques Blanchette reportedly wrote on a Facebook post:
"Anyone who chooses to not heed this directive cannot expect to be rescued and should write their social security numbers in permanent marker on their arm so their bodies can be identified. The loss of life and property is certain. GET OUT OR DIE!"
There have also been some emergency situations where residents were not ordered to leave, but they just had to understand and accept they were on their own and emergency assistance would not be immediately available.
Rapid evacuations can also be self-initiated, meaning you decide to evacuate without any official mandate or recommendation. Maybe you believe a situation is going to break down and you want to leave before things get worse.
Noticed Evacuation
What I called a “noticed” evacuation is when you are given notice to evacuate, usually a time frame during which it is recommended that you evacuate. Often these are voluntary evacuations. Noticed evacuations may have a short-time, as in you have two hours to leave before the wildfire reaches your home. Or, they can be over a longer time frame, as in the case of a hurricane threatening to come on shore in the next two days.
In the case of a hurricane, it will be monitored for several days and residents in the path are usually given an evacuation notice. These evacuations often begin as voluntary, but as the threat and risks increase the evacuation may become mandatory, particularly for those in the direct path of danger.
Your best line of defense is to be ready to take advantage of a noticed evacuation, so you can take as much as you can with you.
Unfortunately, an earthquake usually doesn’t give you much notice. Normally it just shows up uninvited and unexpected. As a result, if you need to evacuate—due to your home not being safe or an earthquake induced hazard threatening your safety—you will probably have little advance notice. Most likely it’ll be a grab and go situation. Just hope you can take your vehicle so you can take more than just the basic kit with you.
Evacuation and Earthquakes
Unlike many disasters—such as hurricanes, wildfires, or a lava flow—earthquakes rarely provide any kind of warning they are coming. This is probably why so many people seem to be really fearful of earthquakes.
Here’s the additional reality, which I mention in other places in this book: Most people survive an earthquake. And, unless you live or work in an older building (pre-1980) or happen to be near the epicenter of an earthquake, it’s not likely the building will collapse on you. The biggest immediate hazard during an earthquake is an unsecured object falling on you. This is why you need to take cover when the earth shakes.
If you’re fortunate to live in an area that uses an early warning system and/or app (like those mentioned here), you might get as much as 30 or 45 seconds before the real shaking starts. That’s enough time to make sure you and your loved ones are in a safe place, and maybe turn off the stove. You may even have time to exit an older building to get to a safe location. But it’s not likely enough time to actually evacuate, unless you are completely ready to grab your pack and leave, although you may still want to find a safe place to take cover when the shaking starts.
The real evacuation, if needed, is after the tremor stops. If there is any doubt in the safety of the building you are in, you need to leave as quickly, and safely, as possible.
It may be that the earthquake has caused other hazards that threaten your location.
Your best plan for an evacuation after an earthquake is a rapid one.
A Comment About Government Camps and Shelters
Some people figure they will just go to a FEMA camp or emergency shelter in the event of an emergency. Most who end up at these shelters do so because they don’t have food. For some it’s lack of water or being unprepared for the emergency, but for most hunger drives them to the shelter.
If at all possible, you should not be so unprepared to the point that you (or your family) needs to go to one of these shelters. This is not because they’re necessarily a bad place. Many of the volunteers who help do a fantastic job.
The problem is the government is not really well prepared to handle a large number of people in an emergency. That has been evident in the aftermath of previous massive disasters, one of the worst examples being the Louisiana Superdome after Hurricane Katrina. In the case of the Superdome, it became a trap that was poorly prepared to handle the scope of the disaster and large number of people, including the ill and injured.
The reality is these camps and shelters need to be highly controlled due to amount of people. Even with control, there will still be some crime within the confines of the camp. Additionally, being in close proximity to hundreds of others also increases the chances of the spread of disease. Imagine being stuck in a camp or shelter while attempting to maintain social distance and wearing masks...not something I want to do.
And, this was mentioned earlier, if you happen to have pets, they will not be allowed in the camp or shelter.
You and your family will be much better off if you are prepared for the emergency, disaster, or catastrophe by having food, water, shelter, supplies, and a plan.
If you need to evacuate, you need to do so as quickly as you can and, ideally, to a place of your choosing.
Getting Prepared to Evacuate
On getting prepared for a possible evacuation, my advice is to have different levels of evacuation preparedness.
The first thing to be aware of is you may be able to evacuate by vehicle. But what if you can't? Or what if the road becomes impassable?
Is the evacuation on foot? Or could you evacuate on bikes?
The first, most basic, level of evacuation preparedness is having the 96-hour pack ready to go for you and all those in your care. Then you can grab and go with minimal notice. The packs can be carried or tossed into a vehicle.
From this level you can add additional packs, bags, or bins that extend the usefulness of your 96-hour packs.
If you have bikes, a rack (or several) could be used to strap packs and items to.
For vehicle evacuation you can add more items.

Having expanded kits/bags/packs/bins already prepared and ready to go means in a rapid vehicle evacuation you can quickly throw in your 96-hour packs plus the expanded items. If you still have some time, you might consider other items that could make your evacuation more comfortable, like a sleeping pad, tent (if you'll possibly be outside), and more food and water.
Additionally, know the alternate routes/roads you can take. Most people stick with what they're familiar with and those may not be the fastest ways out. Also, be aware of where bridges and overpasses are. In an earthquake these may become damaged or destroyed.
National Disaster Response
While some minor issues have been experienced, overall the United States has a fairly good disaster response. However, in recent years a major flaw in the system has been exposed. It is this flaw that can actually put you and your loved ones at increased risk, if you are not prepared.
The Major Flaw of Our Nation's Disaster Response
Our country’s emergency response system is primarily designed with the consideration that only one region is struck by a major natural disaster at a time, leaving other regions available to respond. For decades this has worked moderately well. After all, what is the likelihood that more than one area or region would suffer major disasters at the same time or even in rapid succession?
The 2017 hurricane season revealed the weakness of this planning when multiple hurricanes threatened and struck. While the damage could’ve been worse had the storms tracked differently into the mainland, it was still the costliest season on record.
Hurricane Harvey struck near the Houston area in late August, with record rainfall flooding the area.
In early September, Hurricane Irma struck several locations in the Caribbean, including Cuba, and then moved on to hit Florida.

Less than a month after Harvey, Hurricane Maria become the worst natural disaster to affect Puerto Rico and Dominica.
While not a part of the United States, Costa Rica was struck by Hurricane Nate in early October and became that nation’s most costly natural disaster.

If we continue to expand into neighboring regions, on September 7, a magnitude 8.2 earthquake, with a Mercalli intensity of IX, struck off the coast of southern Mexico.
Less than two weeks later, on September 19, a magnitude 7.1 struck near the Mexico City area.

In just over a month’s worth of time, four major hurricanes and two earthquakes struck in and around a geographical area that is smaller than the size of the United States. This doesn’t even include several smaller hurricanes that affected Central America and the Caribbean. And, it doesn’t take into account the likelihood of smaller disasters, like local floods, wildfires, and storms that can also affect the area.
When more than one natural disaster severely affects multiple regions of the country the flaw of expecting other areas in the country to be able to help becomes exposed.
Multiple Disasters = Delayed Response
What happens if multiple major natural disasters strike more than one region of the United States?
While local and state emergency response time within the disaster zone is severely limited, it can take three or more days for emergency relief efforts from outside the affected area to get in and render assistance. This is a big reason 72-hour kits are not enough, and why you’ll be seeing more of push for 96-hour kits (or longer).
With each successive disaster, response time from outside of the affected area will increase. Available resources will diminish because the country’s plan is based on other areas being available to provide assistance.
One region cannot provide much assistance to another if it is also experiencing a major natural disaster. And, with much of the manufacturing, warehouse, and retail companies running just-in-time operations there is little extra to spare when interstate transportation is affected
Without going into any hypothetical sequence of events, just understand that if no other major disasters have happened, outside help will likely arrive within three to four days. However, if the disaster in your area happens after others, the response time will increase and the resources that are available will be much less
As a real-life example, in February 2011 a magnitude 6.1 earthquake struck Christchurch, New Zealand. Many of the buildings in the business district were unreinforced masonry, and, as a result of the quake damage, many were red-tagged and off-limits. It took six days before portable toilets were able to be distributed throughout the disaster zone, and there was still a shortage. A year later, many households still didn’t have functional plumbing, particularly for wastewater.
Disaster Response Begins with You
Certainly a 72-hour kit will help you initially. But, that’s only a drop of preparedness when you consider the possibility of recovery taking weeks, months or even years.
A related issue is the lack of preparedness of others. In the first few days following a disaster, most people are willing to help. Most of those who are prepared for an emergency are rarely actually prepared for anything lasting more than two or three days. Very few are prepared for anything that extends past three days.
After the stress of a few days of post-disaster recovery, those who aren’t prepared will really start to panic when they realize help hasn’t come, or isn’t as helpful as they expected. The norms and expectations of civil society start breaking down after about three days, and, without adequate law enforcement and government prevention, things can go from bad to worse.
Here's something that isn't well known, if you're lucky outside help will come within three days. Usually external help, like from FEMA or the Red Cross, will take more than three days to get into the worst hit areas. If you're not in the hardest hit zone, or if access to the area has been severely restricted, help might arrive for several days...or longer.
The last thing you need is to expose yourself and your family to those who are not prepared, and who are looking for those who are. The idea of “fair” is gone. Even though they had their chance before the disaster to choose to become prepared, they choose not to. Maybe they spent their money on TVs, game systems, ATVs, or other fun things instead of getting a little better prepared first.
Now, in the aftermath of the disaster, they will see your preparedness as being unfair, and that you should share.
The problem is, too often their idea of sharing may mean taking everything from you and your family. To them it's not fair that you are prepared and they aren't. It's not fair that you have food and supplies and they don't. If the unprepared know what you have, they will come for it, demand it, and take it if necessary.
Many believe you should be able to defend your supplies. While I am not discounting that possibility, a better strategy would be to avoid possible confrontations by either being out of the situation—where you’ve evacuated to a bug out location—or keeping on the low-down, by not apprising others of your preparedness.
The best option in the latter case is to limit exposure to others. Even if you have self-defense options, you will not be able to hold out against an undoubtedly larger force that may come after your supplies if it’s discovered you have what they don’t.
The short of it is, you need to be able to respond to a disaster, and you are responsible for the preparedness of you and your family. If you rely on the government or other group to help, it’s almost guaranteed you, and your family, will end up in a shelter, waiting in lines for a small amount of food and water, with only the clothes on your back and wishing you had done something to become better prepared.
And, what happens if, in that shelter, you and/or your family become exposed to some illness? Not only have you failed to provide and protect for those who count on you by not being prepared, your failure may threaten the well-being of others.
Best to get prepared.
Emergency Power
Electricity is what makes our modern civilization possible. Emergency power is where/how we get electricity when the normal power is out.
Emergency Power Sources
For a short-term emergency power, batteries can be an adequate solution for small devices, like flashlights, radios, or small gaming systems. We have a couple dozen rechargeable batteries that we use in many of our devices. Whenever possible I try to get devices that don't have unique or unusual batteries. I prefer devices that use AA or AAA batteries as it makes it easier to keep these on hand knowing most battery-operated devices will use either of these.
We also have some D-size and C-size AA adapters. These adapters allow a AA battery to fit into a D or C size battery compartment. The AA battery doesn't last as long as the D or C, but it does allow us to power the device if we don't have the right size.
Among my equipment is a small solar panel set designed to charge AA or AAA batteries.
However, if you want to run more power-hungry electronics, like a laptop computer, TV, microwave, or power tool then regular batteries won’t cut it. You need additional sources of providing emergency power.
While I have yet to invest in a home solar system, we do have some portable solar panels and several small battery banks. The power banks allow us to keep cell phones and other small electronics charged.
We have a couple of 100-watt solar panels and a couple of larger batteries that can be charged by the panels. It’s far from being able to power our home, but it could power some lights and keep electronics (like our phones) charged. And we could even watch a video on a TV or computer to help keep the kids entertained.
Alternate Emergency Power
Gas or propane-powered generators are common backup and emergency power sources.
Solar power is an increasingly popular alternate source for electricity, but you need to have battery banks that the panels can charge. Without batteries, solar power is only available when there's sufficient sunlight.
Wind power is another option. Like solar I'm not intending to go into detail about how to implement wind power, just know it may be a possibility...especially if you live somewhere that has nearly constant and even predictable wind.
There are other possibilities for generating emergency power. One of these is hydro-electric power. Again, I'm not providing specifics, just mentioning a possible option. Basically you use the flow of water to turn a turbine that is connected to a generator which creates electricity. If a flowing water source is nearby, this option might be considered.
Of course, combining two or more alternate sources would give you more options (and cost more).
In any case, be aware that after an earthquake you need to check your power sources and equipment. It is possible they could be damaged.
Electricity Explained: How electricity is generated (U.S. Energy Information Administration)
Emergency Power for Internet and Phone?
In the case of a power outage anything plugged into an outlet won't work. If you need to use the device, some kind of emergency power will be needed.

Expect your internet service to not be working. Most routers are plugged into the wall, which means they won't work if the electricity is out.
For internet service in an emergency, when the power is out, a cell phone (smartphone) is probably your best (and cheapest) option. But it still may not be very reliable.
If you can power the router using some other means, like a solar battery, then it's possible you could still have internet access (provided the internet service provider is still operational and its stations haven't lost power).
You could also pay for something like satellite internet, but you'll still need to power whatever router/device that connects to the satellite signal.
Some amateur radio operators have limited internet use over the radio. If you have a radio license, this might be something to look into.
If you internet service is over the phone line, it won't work if additional electricity is needed and you can't plug it into an alternate/emergency electric source.
Most landline phones should work as the phone company provides a small voltage over its phone lines. However, if your phone is a cordless one, with a charging base station that the phone line plugs into, that phone won't work. If you have a landline still in your home, consider getting a simple plug-in-the-wall phone. This should continue to work, as long as the phone company's line is working.
For emergency phone service, try not to use cell phones for calls in the initial aftermath of an emergency or disaster. Texts are almost always more reliable, and they use less bandwidth than voice calls which means they're more likely to work.
Utilities Shut Off
Utilities are almost an invisible part of our homes. We often take utilities like electricity and running water for granted, until we experience a power outage or water main break that disrupts our normalcy. In the event of an emergency, we should know where the utilities shut off valves, breakers, and/or switches are. If needed, and it can be done safely, shutting off a damaged, or potentially damaged, utility can help prevent or reduce damage or injury.
Shut Off Utilities?
There are two things you need to know about the home utilities when it comes to emergencies. First, you need to know where the “mains” are. Referring to a utility "main" can refer to the main line that comes to the building, or it can refer to the main valve or switch before the utility goes to the rest of the building. Where utilities shut offs are concerned, we're looking for these main valves or switches.
The second is related to the first, you need to know how to shut off the utility. It’s one thing to know where the gas meter is, and to think that is where you shut off the gas. But, it’s another thing to actually know where and how to shut off the gas.
A word of precaution. If you have any doubts about how to shut off a utility, please contact a qualified professional. While many utilities have become fairly standardized, there may be differences particularly between older and newer utility mains. The last thing you want to be doing is trying to figure out a shut-off in an emergency situation. In fact, if you can’t shut off a utility quickly in an emergency it's best for you to leave quickly.
While leaving is probably the safest course of action--particularly if life is threatened with injury or death--if you have time, and know how to do so safely, shutting off a utility may help prevent further damage to your home. And it may help reduce the risk to those in the building.
What I am sharing by no means constitutes professional advice, and applies to my own home and what I have done. Many utility shut-offs are similar. The three most common utilities—at least in the areas I have lived in—are natural gas, electricity, and water.
Some utilities, like electricity, may be above ground. But be aware that many utilities, like gas and water, run underground. And where I currently live, the electrical lines are all below ground in the residential area.
If you live in a house it’s very useful to know where those utilities are located. If you ever need to dig in your yard you are required to have the utilities marked prior to digging. Most states offer a free utility marking service by calling a service like 811. In some places it’s known as Blue Stakes.
In any case, if you get the utilities marked take a picture of the markings. Please note, this is not for future projects because you are required to get utilities marked before each digging project, and the marking is only good for two weeks. These photos are for emergency reference. For example, if you happen to find some bubbling or water puddling in the yard it's helpful to know if you have a gas or water line nearby.
Shut-offs for the most common utilities you should be aware of include:
- Electricity
- Natural gas
- Water
If the home has solar panels there may be some things you may have to do in the event of an emergency. Some solar panel systems have an automatic switchover in the event of a power outage. In any case, after an earthquake you need to check your full system. Don't assume there isn't any damage.
Other Utilities
Some houses have other sources of heat, such as oil or propane gas. Because of the varying nature of these other utilities I won't be covering them at this time.
For houses with external propane tanks, usually found in rural environments, the shut-off is at the main tank, usually next to the gas level gauge. The next time the tanks are filled, learn how to safely shut them off.
I have no experience with homes that use heating oil, so I strongly encourage you to talk to your supplier or qualified professional about how to secure the system in the case of an emergency.
Electricity Shut Off
Electricity is certainly dangerous, but I have a lot more experience with electricity than gas, and electricity (usually) isn’t likely to blow up my home, although a spark from an electric source could start a fire or ignite an explosion, particularly if gas has accumulated.
To prevent sparks or the risk of electrocution, you need to know where the electricity shut off is.
Electricity Shut Off
Most people assume the circuit breakers in the house is where the electricity gets turned off. If you’re only wanting to turn off certain parts of the house that is true. But if you want to shut off all the electricity in the home, you need to shut off the electric main. For many homes, the electric main is outside, usually near the electric meter.
In many homes, the electric main looks like a big circuit breaker switch. It's this main where electricity is shut off.
Most newer homes (particularly those built in the 1970’s and later) will use circuit breakers with similar-looking mains, but there are still plenty of older homes that have older style breakers, circuits, and even fuses.
If you don’t know, your best option is to get an electrical professional to show you were your electrical main is located and how to shut it off.

Opening the panel to the side of the meter reveals a single, larger-type circuit breaker. This is the electric main breaker. From here the electricity goes to the circuit panel inside the home. While circuit breakers inside the home have typical amp ratings from 15 to 20 (or higher for things like stoves and air conditioning), the main will have a larger rating like 100 amp or 200 amp.

Reducing Surge Risk
Natural Gas Shut Off
If there is any utility I am most cautious about, it is the gas. As part of you preparations, you should know where and how to use the natural gas shut off.
Natural gas actually has no smell. However, the chemical mercaptan is added and it creates an odor, what most people describe as rotten eggs, so a leak can be detected.
While natural gas is a safe and clean fuel, it is highly combustible and a leak can create a risk of fire or explosion.
Natural Gas Signs of a Leak
Typically natural gas is shut off because of a suspected leak. Besides the smell of rotten eggs possibly indicating a gas leak, some other potential signs of a leak include:
- The sound of whistling, roaring, or hissing coming from a natural gas appliance.
- Damaged gas lines going to a natural gas appliance.
- Grass or shrubs changing color, looking more brown or rusty, could also be an indicator of gas leaking out of the pipe.
- Unusual bubbling or soil movement, particularly if it’s near the natural gas line going to your house (remember the recommendation to photograph your utility lines…this could help you know if the bubbling is near your gas line).
- An exposed gas pipeline after a fire, earthquake, or other disaster.
(UGI Energy Link, blog, "I Think I Smell Natural Gas In My House")

Natural Gas Leak?
- Don’t do anything that might cause a spark, such as unplugging an electrical device, turning on/off a light switch, or even using a phone.
- Immediately extinguish anything that is burning—candles, cigarettes—and don’t light a match, stove, or cigarette lighter.
- If you can quickly do so, let fresh air inside by opening windows and doors.
- Turn off the main gas supply, at the meter, and don’t turn it back on until safe to do so.
Water Shut Off
While water shouldn’t be the cause of an explosion or fire, it can cause a lot of damage to a home. I'm not sure of the statistics, and there probably aren't any accurate. Knowing where the water shut off can save or reduce the amount of water damage in your home, at least water coming from the home's water supply.
Floods are the most common and costly natural hazard (Flood After Fire), but there isn't a shut-off valve to help prevent flooding from external water sources.
However, depending on what insurance site you reference, water damage (often from leaking pipes inside the home) is 7 to 10 times more likely than fire. In August 2019, Chubb Insurance in Australia stated that internal water damage claims were up 72% in the last 5 years (Chubb reveals its water damage claims are more common and costly than fire and burglary)

Find the Water Shut Off
Solar Panels - Emergency Considerations
While not a typical utility, solar panels are becoming cheaper and more common.

Many people who have solar panels are hoping to have at least a measure of energy independence. Some go solar wanting to reduce their carbon footprint and help the environment. In some municipalities excess solar power can be sold back to the power company, where you get a bill credit.
Whatever the reason for going solar, it's not uncommon for most people to assume that just because they have solar panels they will have power if the event of a power outage, such as during a natural disaster.
Depending on the system, the answer is "it depends."
The solar panels may provide power during daylight. Unfortunately, if the solar panel system doesn’t have a battery storage system it won't provide power during the night or when there isn't enough sunlight. If the system doesn't have a battery storage system, it probably won’t be a very reliable source of power in an electrical grid outage, if it even provides power.
While solar panels are awesome, even with a battery storage system they aren’t a guarantee you’ll have electricity in a grid failure after an earthquake or other natural disaster. If you have solar panels you need to be aware that they, along with their systems, can be damaged in an earthquake or other natural disaster.
If you have solar panels, I strongly advise you talk to your solar panel professional about what you should check for to ensure safe operation after an earthquake or other disaster. Some of the things you should be looking for include broken panels, loose connections, damaged wires, and fallen or damaged batteries.
Should you be considering the purchase of solar panels, be sure to ask about what needs to be done and checked in the event of an emergency. And, make sure you get the batteries so you're more likely to have power when the electrical system is out.
Food Safety
Oh the irony. You survive a natural disaster or emergency only to become sick because of the lack of food safety.
Make sure you and those in your care are food safe. Be aware of and practice food safety and sanitation.
Food Safety and Sanitation
Here are some general food safety and sanitation guidelines:
- Store food in covered containers
- Keep eating and cooking utensils clean
- If food contacts flood water, throw it out, especially if the flood water is contaminated (which you may or may not know).
- Throw out cooked or refrigerated food that has been at room temperature for 2 hours or more.
- For infants, ready-to-feed formula is easier than trying to mix the powdered stuff. If you do mix formula, use bottled water, or boiled water as a last resort. Breastfeeding is always best for infants, but there are cases when this isn't an option and in high-stress environments (like a natural disaster or emergency) breast milk may not be produced as much as normal.
- Don't eat foods from cans that are swollen, dented, or corroded, even if the food looks safe.
- Don't eat food if it doesn't smell normal, even if the can looks normal. Best to err on the side of caution, if it doesn't smell right, don't eat it.
- For sanitary (and fire) reasons, don't let garbage accumulate inside.
Keeping Food Safe Without Power
- Keep the refrigerator and freezer doors closed as much as possible. In other words, get things out quickly and close the door/lid.
- If unopened, a good refrigerator will keep things cold for about 4 hours. If the power is out for 4 hours or less, the food should be safe.
- For proper (and safe) food storage, refrigerated or frozen food should be at or below 40 degrees Fahrenheit.
- Use a refrigerator/freezer to check the temperature.
- Any food that has been at or above 40 degrees Fahrenheit for two or more hours should be discarded.
Dry Ice
If you can get dry ice, it can help keep your food cold. Before a power outage, or emergency, find a local vendor where you can buy dry ice. Then, if the power is out in your home or neighborhood, you can purchase dry ice to prolong the life (and safety) of your cold food should the power be out for an extended time.
- 25 pounds of dry ice will keep a 10 cubic-foot freezer below freezing for 3-4 days.
- Don't let the dry ice come in direct contact with the food.
- Use dry, heavy-duty gloves when handling dry ice and be careful to avoid injury.
Food Safety Before the Emergency or Disaster
The normal food supply chain will be disrupted in an emergency. It doesn't even have to be a natural disaster. The COVID-19 pandemic caused a disruption, and some products can still be problematic to find.
Often you'll see the recommendation to have at least a 3-day food supply. I recommend a minimum of 4 days for emergency food. That's actual emergency, quick-prep, easy-to-store food.
You really need to have at least 1 week's worth of food. Two should really be your recommended minimum. And that's food that doesn't require refrigeration or freezing, basically shelf-stable food.
Your "emergency" food storage should:
- Have a long storage life. Not something that expires in a matter of months.
- Require little or no cooking, refrigeration, or water. It utilities are out, or become unreliable, you don't want to risk your health with questionable food safety.
- Make sure special diet needs are met, such as for infants or family members on restricted dietary needs.
- Remember to include food for pets.
- Limit the really salty or spicy food that increase your need for water, which could be in limited supply.
Storing Emergency Food
Remember your food doesn't have to have a 10, 15, 25+ year shelf-life. It should be food you eat. As long as you rotate through your food storage, you can basically keep "normal" food as your food storage. Just replenish what you use, and grab some extra when you go shopping again.
Check the expiration dates. Use and replace food before the expiration.
Home-canned foods usually need to be discarded after a year. But home storage is such a broad subject, and there are a number of storage methods, you need to closely follow the recommendations and instructions provided by the storage product vendor.
Food should be stored in a cool, dry, dark area. The ideal temperature range is 40 - 70 degrees Fahrenheit. Heat will reduce nutritional quality and can cause food to spoil more quickly.
Keep your food storage away from exhaust areas of ranges, refrigerators, or anywhere there's heat.
Store food away from gasoline, paints, solvents, oil, and other petroleum products. The biggest issue is some food can absorb their smells, which affects the taste.
Make sure to protect your food from rodents and insects. Keeping products inside waterproof or airtight containers will help keep them longer, and protected. Boxes or paper cartons are more susceptible to water damage, as well as insects, and rodents. Keep food stored on shelves that won't affected by flooding.
Preparing Emergency Water
The minimum recommendation is to store at least 1 gallon of water per day per person and pet. More water is needed in hot climates, for those who are sick, and for pregnant women.
Store at least 4-days of water for each person and pet. For example, two parents, two children, and a dog would mean at least five gallons of water per day, or 20 gallons for four days.
Store your water where it will be safe from flooding.
If bottled water has an odor, don't use or drink it. Get a replacement if you can...this is for commercially packaged water.
Like other commercial products, bottle water has an expiration date, and it should be used before that date.
The recommendation is to replace your water storage every 6 months.
Keep a bottle of unscented, non-concentrated, liquid chlorine bleach to use to disinfect water, and for general cleaning and sanitizing. The bleach should be stored in a similar temperature range (no more than 70 degrees Fahrenheit (21°C). Bleach degrades over time, even unopened bottles. The bleach in opened bottles loses its potency even faster. Unopened bleach should be used and replaced every year.
Does water actually "expire"? If it's stored in clean, sanitized containers and kept sealed it should store for much longer than 6 months. When you open it, if there's discoloration or a smell, don't use or drink it.
What usually happens is water becomes "stale" where it loses its taste. Some aeration--like sloshing it between two containers to add air to the water--can help with the taste. A pinch of salt (not more) might also help. Keeping water replaced every 6 months helps reduce the amount of "stale" water, and it helps you become aware of how well your water storage containers are working.
Before a Power Outage
Refrigerated and freezer foods have safe temperature ranges, and safe times they can be outside of that temperature.
Get thermometers for your refrigerators and freezers. Freezers need to be at or below 0° Fahrenheit. That's below the freezing point (32° F). Refrigerators need to be at or below 40° F. Having the thermometers will let you know if the food is in the safe temperature range.
Keep ice cubes, ice packs, or containers of water in the freezer. In the case of a power outage, this ice can be used in the refrigerator, cooler, or left in the freezer to help keep food cold. The melting ice can also be used for drinking water.
Leftovers, fresh meat, and other food that isn't needed immediately should be put in the freezer so they not only last longer, but if the event of a power outage they'll be at a safer temperature longer.
In the freezer, keep food together which helps the food stay cold longer. Not letting your refrigerator and freezer stay empty not only will help keep them more efficient, but when the power goes out the full fridge or freezer will stay cold longer.
If the power might be out for more than 4 hours, consider transferring food to coolers. The smaller container can be easier to be kept cooler longer.
Knowing where you can buy dry ice or block ice can help keep your food cold. Often power outages are more local, so you can drive to where you can buy ice and bring it back home.

Food Safety During the Emergency or Disaster
- Perishable food was not refrigerated or frozen properly.
- Food came (or might have come) in contact with flood or stormwater.
- There is an unusual odor, color, or texture.
After the Power Outage
- If the freezer has a thermometer, check the temperature and if it's below 40° F the food is safe, and freezer food can be refrozen.
- If there isn't a thermometer, check each package. You can't determine safety by how things look or smell. If the food still has ice crystals or is 40° F or below, it's safe to refreeze or cook.
- Food that has an unusual color, texture, or smell.
- Food in non-waterproof packages.
- Food in cardboard containers, like juice boxes, milk, or baby formula.
- Food containers with snap-lids, crimped caps, twist camps, flip tops, snap tops, or screw caps. These are too difficult to safely disinfect and sanitize the opening without opening the container, which can then potentially contaminate the contents.
- Home canned foods as they can't be safely disinfected.
- Any canned foods or containers that are opened, damaged, or bulging.
- Food containers that, when opened, spurt liquid or foam when opened or which contain discolored, moldy, or bad-smelling food.

Salvaging Commercially Prepared Food
- Remove labels, if possible, and note the expiration date.
- Brush or wipe off any dirt or silt.
- Wash pouches and cans in hot, soapy water.
- Rinse the washed pouches and cans with clean, safe water.
Getting emergency food and other long-term food storage is essential to survival. However, what are your options for emergency cooking?

Some emergency food doesn’t require cooking or other preparation. But most long-term storage food requires some kind of preparation, even it’s just adding water.
If your gas or electric stove isn’t working (no electricity) how will you boil the water for your oatmeal or meal that requires you to “just add hot water”?
There are a number of options, too many to discuss, but they can be summarized into three broad categories: home, camping, and backpacking. In this article we'll look at general emergency cooking options.
Emergency Cooking Options
Assuming you don't have alternate electrical power for an electric range, or working natural gas for a gas stove, there are some options for emergency cooking at home. Keep in mind the camping and backpacking cooking options are completely viable for at use at home. The home options are generally those which can't be transported, or which wouldn't be practical to take from the home in an emergency.
Some of the more popular considerations for at-home emergency cooking are propane or charcoal bar-b-que grills. Propane tanks are fairly safe to use and, as long as they remain undamaged, can last for years.
Some homes have fireplaces, wood stoves, or an outdoor fire pit. These options are generally not portable, but they should not be neglected in being prepared at home.
One of the options we have is charcoal. If you have a charcoal stove (or fire pit) you can easily store bags of charcoal—just make sure the charcoal stays dry. The great thing about charcoal is, as long as it's dry, it has a very long shelf-life.
If you have an alternate cooking source at home, such as a wood stove, make sure you have plenty of fuel for it.
Don't rely on a single source for emergency cooking
Large camping stoves often attach to a 20-pound propane tank. There are smaller camp stoves, with smaller fuel tanks. And propane isn't the only fuel option. There are stoves that use liquid and gas fuel. Some stoves use mixes or have dual or tri-fuel options.
The main feature of these stoves are they can be easily packed into a vehicle, but they are too bulky to take with you if you’re on foot. These camping stoves are great options for home preparedness, and if you need something to take in a vehicle with you during an evacuation.
The backpacking category are all the smaller, lightweight stoves than can be easily packed into a backpack.
Other alternative cooking options that can be used in an emergency include:
- Candle warmers
- Chafing dishes
- Fondue pots
Food Safety
Let’s face it, a 72-hour emergency kit does not provide enough food. Yes, you can eat for those three days. But, what about beyond that?

We’ll look into more about these emergency kits on other web pages, but let’s assume you'll be in your home for the duration of the emergency, including the immediate aftermath. What kinds of food should have have and for how long?
What Kind of Food?
The simple answer is store the types of food you and those in your household will eat.
Too often food storage involves big pails of wheat, rice, or beans. While this may be suitable for long term food storage, if you don't have any way to prepare it--or you simply don't want to eat it--then it's probably best to spend your money on food you will eat.
That said, in an emergency you may not be able to prepare and cook your normal foods.
If you have canned foods, make sure you have at least a couple manual (non-electric) can openers.
Foods that don't need cooking will be easiest to prepare in an emergency, but often these types of food don't have shelf lives of more than a few years.
Foods that require minimal preparation, like dehydrated or freeze dried where water is added, often have a long shelf life. Typically freeze dried food tastes better, but it is more expensive.
In an emergency--like the immediate aftermath of an earthquake where you have no electricity, gas, or running water--the first few days should be primarily foods that can require little or no preparation to eat. You will have enough other stress to deal with that it's beneficial to not add how you're going to prepare your food. The most preparation you will want is to boil water.
And it may be beneficial to have sufficient quick-prep foods to last you and your household a week or two.
Once you get into a routine of how things can be done it'll be easier to add foods that require additional preparation.
How Much Food?
While you need emergency food, in your kit and extended kit, in your home you should plan to have a minimum of two-weeks’ worth of food for each person.
Two-weeks is the absolute minimum. Surprisingly most people have much less than that on hand, many with less than a week’s worth of food. Two-weeks of normal, everyday food is good but it'd be better to have two-weeks worth of emergency food...food that requires little to no preparation. Food that requires adding water and maybe heating up. Keep in mind that electricity and running water may not be working. Add some normal food that doesn't require any preparation to keep your palette not feeling too out of sorts.
After the two-week supply, the next step is to shoot for a 1-month, and then make a goal to get a 90-day supply of food. Remember, two weeks of this is the emergency level food. So, add two weeks of your more normal diet. Just remember that cooking may be more restricted than you're used to. And, depending on the emergency there still may not be power or running water.
A side comment. In some countries there are laws against food hoarding, meaning it is illegal have more food than is needed for a specified period of time. Even in the United States of America there is the potential for the government to restrict how much food and other supplies you can have on hand, specifically in the event of a long-term emergency (such as a war) or martial law.
If you have a concern about the legality of food storage, make some phone calls to inquire about any food storage laws in the area.
As for the United States, I’m not aware of any laws that would prohibit you from storing food and other supplies. Because most disasters are not nationwide, and usually do not affect more than a small region, it is safe to plan on you being able to keep your food.
However, it's best to not talk to others about how much food or other supplies you may have. The best course of action is to downplay your preparations, limiting your discussion to the short-term preparations, if you even talk about what you have.
If possible it's a good idea to make sure your food is not visible. If you happen to have food stored that you don't like, or which is past it's expiration, don't get rid of it...unless you just don't have room for it. This food can be useful if you need to barter with someone, to exchange food for something else you need.
Here are your two "emergency" food goals.
- 4-day emergency/bug-out food that you can take with you if you have to leave. 1 week (or more) is better if you can leave in a vehicle.
- 2-week emergency food storage at home.
After you get the 2-weeks, work on a month and then build towards the 90 days. More than 90-days is great, but don't get stuck on long-term. Focus on the short-term and then intermediate. If you focus on the long-term it can become too overwhelming and then becomes less likely that you will follow through.
Some Suggested Emergency Food Supplies
When beginning and building your emergency food supplies and food storage, here's a few things to keep in mind.
- Choose foods that you and your family eat, will eat, or can eat.
- Remember any special dietary needs.
- In an emergency situation, avoid foods that will make you thirsty.
If there are infants or young children, don't forget to include food needs for them.
And for you (and others) include some comfort/stress foods.
Here's a few suggestions to get you started:
- Ready-to-eat canned meats, fruits, vegetables
- Protein or fruit bars
- Dry cereal or granola
- Peanut butter
- Dried fruit
- Canned juices
- Non-perishable pasteurized milk
- High-energy foods
Don't forget to include a manual can opener!
More information at Ready.gov Suggested Emergency Food Supplies
Water Prepared
Water is essential to survival and being water prepared will help you survive an emergency or disaster.
However, water preparedness is often minimized in importance in emergency preparations. It is important that you don’t ration water, unless you are required to do so. Your body needs water more than food, and this should be a top concern in your preparedness.
If you read some of the earthquake scenarios, you should have idea of how critical water is, and how likely it may become limited or inaccessible in an emergency. You should have also noted how much longer it will take to restore potable water service to an earthquake devastated area than it will to restore electrical power.
As a result, you should begin to understand that water for three days doesn’t cut it. Even a week isn’t enough.
Water Prepared - Rule of Thumb
The basic rule of thumb for emergency water storage is one gallon of water per person per day. This is just for drinking and use in food preparation, and really basic sanitation. If you’re really conservative you could even use a small amount for brushing your teeth.
My strong recommendation is to have, whenever possible, a minimum of two weeks’ worth of emergency water storage. For my family of six, being water prepared equates to six gallons per day times 14 days, or 84 gallons, on hand.
The goal should be at least of four weeks of water per person. That is at least 28 gallons per person. Storing that much water is a challenge, especially if you live in very limited space.
In addition to the actual water you store, you need water purification filters as well. The stored water will get you through the initial disaster and days or weeks immediately following it. But you will still need to get water after that. You might be able to lug a container to a public water dispensary, but it’s best to not count on that.
Just as at least two methods of cooking are recommended, you should have at least two types, ways, or means to filter and purify water to make it suitable for drinking. While you may have actual water storage of a month (or longer), it is vital you have options for long-term drinking water.

Water Prepared - Filtration and Purification
Did you read some of the earthquake scenarios…where culinary water may not be restored for three months or more?
Becoming water prepared is not just critical, it's a matter of survival.
At six gallons a day, for 90 days, my family would need 540 gallons. That would be 10 of the 55-gallon drums, or 108 of the 5-gallon containers. I’m not sure where I could even put that many containers.
This is my goal, and my recommendation. Store enough water to get you through a month, and then have several means to make water safe to drink after that. After using the 30-days of water storage you can be using the empty containers to gather and store water, especially if water is unreliable. Your various methods of filtering and purifying water can then be used on the water you’ve been collecting, as well as new water sources.
As part of our emergency equipment I have purchased several water filters. Among the filters are water bottles with built-in filters, filter straws, backpacking pump-style filters, and a filter with a UV sanitizer.
The best time of year I’ve found to purchase water filters has been at Black Friday sales. I have also found great deals at large, membership warehouse stores, but these stores do not carry the filters year-round so it’s kind of a hit and miss. Other options are outdoor retail stores (including online options) that have sales during the spring and summer months. I have also found the rare deal in clearance, usually at the beginning of the year.
For us, the biggest water-related post-disaster challenge will be to locate water than can be filtered for use. Near our current home, a small river is less than 500 feet away. Hopefully it will still be running after an earthquake. I suspect it will be, although I’ve read accounts of springs and streams drying up, or even increasing flow, for a time after a large earthquake.
Most commercial water filters will filter out contaminants from questionable water and make it safe to drink.
Water bottles with built-in filters and filter straws are great for personal use, but lousy when it comes to purifying a larger quantity for use in cooking or to share with others. This is where pump-style water filters can be more useful.
Besides commercial filters, there are other methods you can use to disinfect water to make it drinkable.

Emergency Water Disinfection
Emergency water is one of the, if not the most, important aspects of preparation. Yet, the focus is often shifted more to food and gear. Food, shelter, equipment...these are important but without water--good, safe water to drink--you will end up dying.
Besides water storage and having the means to filter and purify water, there may be a time when you need to use get emergency water...without the use of a filter.
If you read Red Cross, FEMA, or other disaster assistance organizations they usually don't mention the use of specific backpacking-type water filters. From what I can gather there are a few reasons for this. First, being non-profit and/or government organizations, they are not allowed to endorse a commercial product, so you won’t see them recommending any particular filter.
Another factor is backpacking filters cost money. These organizations want to promote easy, inexpensive methods to obtain clean drinking water. Filters are great to get safe water, but there are other options.
There are three methods that are generally recommended: boiling, chlorination, and distillation.
Boiling Emergency Water
Boiling water is the most common, and probably one of the easiest and safest, methods to disinfect emergency water. The downside is it requires a heat source, and, once boiled, you need to wait for the water to cool down. If you’re cooking food, make sure you have some water that can be boiled. While boiling water on a propane stove may not be able to happen simultaneously as cooking a meal, you can probably add an extra pot, with water, on a cooking fire. That way you’re using the same fire to cook your food, and provide safer drinking water.
Boiling water is sufficient to kill most disease-causing biological contaminants, such as viruses, protozoa, and pathogenic bacteria. However, because some of the water leaves as steam, any other contaminants in the water become more concentrated. A good pre-filter can strain out many of the larger particles.
Here’s the recommendation for boiling water:
- If the water is cloudy, let it first settle.
- Let the water filter through a coffee filter, clean cloth, or other type of homemade filter to remove the larger debris and contaminants from the water.
- Bring the water to a rolling boil for at least one minute—this is a rolling boil, not just little bubbles. If you’re at a high altitude, above 5,000 feet, boil the water for at least three minutes.
- Let the water naturally cool down and then store it in clean containers.
Boiled water will taste flat. A couple options to improve the taste is to add a pinch of salt for each quart of water. Taste can also be improved by aerating the water, by pouring it from one clean container to another several times.
Chlorination - Emergency Water
Another method for disinfecting emergency water is to use regular household bleach. If you can’t boil the water, this is a good alternative.
This is important: Do not use color safe, scented, or bleaches that have added cleaners!
Use only regular, unscented chlorine bleach products. The active ingredient should be 6 or 8.25% of sodium hypochlorite. Some sources will state 5.25 to 6 percent. In any case, it should be no less than 5.25 and no more than 8.25 percent.
The bleach should be stored at room temperature and be less than a year old because it will degrade over time. Unopened bleach can last longer, but the bleach you should use for chlorination should be from an unopened or newly opened bottle. The reason is the potency decreases over time. Unopened bleach will also degrade over time, it will just take a longer than opened containers. Because bleach does lose its strength over time, boiling water is a better alternative. But, if you choose to include chlorination as an option, be sure to rotate your bleach regularly so none of it is more than a year old.
To treat your water with bleach, the following is what is recommended by the United States Environmental Protection Agency, specifically on this web page, which also discusses boiling water: https://www.epa.gov/ground-water-and-drinking-water/emergency-disinfection-drinking-water.
First, let cloudy water settle. Filter the water through a coffee filter, clean cloth, paper towel, or other homemade filter to remove larger debris.
Using a clean dropper (you might have one in the medicine cabinet or emergency kit) and fresh bleach (less than one year old), use the table that follows as a guideline for how many drops of bleach should be added.
If the water is cloudy, colored, or very cold, double the amount of bleach.
Stir the bleach into the water and let it sit for 30 minutes. There should be a slight chlorine smell to the water. If it doesn’t, repeat the dosage and let it sit for another 15 minutes before using. If, after a second treatment, it still doesn’t have a bleach smell, discard the water and find another source.
If the chlorine taste is too strong, pour it from one clean container to another and let it sit for a few hours, which allows for some of the chlorine to evaporate and degrade.
Table of amount of bleach per volume of water. Bleach may contain 8.25% sodium hypochlorite. Taken from https://www.epa.gov/ground-water-and-drinking-water/emergency-disinfection-drinking-water
Water volume: 1 quart (1 liter approx.)
Qty of 6% bleach to add 2 drops
Qty of 8.25% bleach to add 2 drops
Water volume: 1 gallon
Qty of 6% bleach to add 8 drops
Qty of 8.25% bleach to add 6 drops
Water volume: 2 gallons
Qty of 6% bleach to add 16 drops (1/4 tsp)
Qty of 8.25% bleach to add 12 drops (1/8 tsp)
Water volume: 4 gallons
Qty of 6% bleach to add 1/3 teaspoon
Qty of 8.25% bleach to add 1/4 teaspoon
Water volume: 8 gallons
Qty of 6% bleach to add 2/3 teaspoon
Qty of 8.25% bleach to add 1/2 teaspoon
Distillation - Emergency Water
While chlorination and boiling are options for disinfecting emergency water, distillation is the process where you can get clean water. This process removes biological and other contaminants from the water. It is also the only process that can purify and make salt water drinkable.
To understand distillation, consider nature’s water cycle. Water evaporates into the atmosphere, where it condenses, and then precipitates through rain or snow.
During the evaporation process, which is primarily caused by the sun heating the water (such as the oceans), liquid water turns into vapor. In this process any contaminants are left behind while the pure water vapor rises into the air.
Eventually the water vapor cools and condenses into clouds, which move over land and the water falls to the earth in some form of precipitation. Unless the precipitation—such as rain or snow—is falling through polluted air, the water is pure.
The distillation process is similar. In a closed system (meaning water vapor doesn’t escape), water is heated up and water vapor forms. The water vapor then condenses on a surface, which is collected as pure water.
The Red Cross and FEMA have produced a pamphlet titled, Food and Water in an Emergency, in which a simple emergency still is described. The following image is from page 12 of the pamphlet.

Water Storage
The goal for your water storage is to get you through the emergency, whether it lasts less than a day or for several months.
In the immediate aftermath of a natural disaster, such as an earthquake, the last thing you need to be doing it preparing water to drink. You want ready-to-drink water, at least a few days of it. Commercially bottled water works well, although it costs more than if you were to store water yourself.
After you’ve gotten through the first several days after the emergency, you will be in a better position to figure out where you can obtain water, and what options would be best to make it drinkable. This is why it’s best to have a few alternatives because one might be better than another in the actual emergency aftermath.
Water Storage Containers
My preferred storage containers are the 5-gallon water jugs, with a spout. These food-grade containers are fairly easy to move and transport, if needed. Should I need to evacuate by vehicle, I plan to grab a few of these.
You can buy huge water storage barrels, even some that stack. These are great, but you won’t be able to move them once they’re full. In some future year I may purchase a couple of these, although in our current home I’m not sure where I’d put them.
Be aware that an earthquake can knock over tall, or stacked, water storage. You should secure water storage to keep it from tipping/falling over. If you can push the top of the empty container and easily cause it to tip over, then, when it’s filled with water, the shaking of the earth could cause the weight of the water to rapidly shift inside the container, and knock it over.

Water Storage "On the Cheap"
Since I do a lot of preparations “on the cheap” we also use a lot of juice bottles, and a few soda bottles, for water storage. These bottles, and lids, need to be cleaned out really well. Sugar residue from juices and sodas gives bacteria a great place to grow.
Before using, thoroughly clean the containers using dishwashing soap and water. Rinse them really well.
Sanitize the bottles by adding a solution of one-quart water and 1 teaspoon of non-scented bleach to the bottle. Swish the solution around the entire inside of the bottle. If you’re sanitizing multiple bottles you can then pour the water-bleach solution into the next bottle or into a pitcher to be used when then next container is ready. After sanitizing the bottle, rinse it thoroughly with clean water.
After getting them cleaned out well, these bottles make easy water storage. Personally, I prefer the juice bottles as they tend to be a heavier-duty plastic. And most of the juice bottles are more rectangular in shape, which means they fit better on the shelves than round soda bottles.
As a child, I remember seeing some of our water storage in cleaned-out, 1-gallon milk jugs. These are not ideal as the plastic is flimsy and deteriorates easily. I’ve seen some jugs become brittle and break, and others that get punctured easily. But they are better than nothing, and they will last for a short period of time. Make sure the bottles and lids are really well cleaned out and sanitized because any milk residue will also become a bacteria breeding ground. If you don’t have anything else, at least start your water storage with these. Just plan to start replacing them as soon as you can.
Don't use cardboard-based containers. These are not designed for long-term storage.
And, it’s better to not use glass containers as they can break easily and are much heavier. But, if these are what you have to start with, they are better than nothing.
After you have clean and sterilized containers, you need to make sure you’re not going to contaminate the water. Before filling any containers, wash your hands really well. Ideally, use sterile gloves when filling the containers. Any bacteria from your hands can contaminate your water storage.
Fill your bottles with regular tap water. If the water utility company already treats the water with chlorine, you don’t need to add anything to the water to keep it clean. If you’re using water from a well or other source that is not treated with chlorine, add two drops of non-scented liquid bleach to each gallon of water. This is about one drop per two-liter bottle.
Use the original cap to close the container, being careful to not touch the inside of the lid.
Write the date on the container so you know when it was filled. Store the water in a cool, dark place.
Water Storage - Rotation and Location
The recommendation is to replace your water storage every 6 to 12 months. However, water does not have an expiration date if it’s stored in a clean, sealed container. However, there are a couple of reasons to replace the water.
First, rotating your water helps keep it tasting fresher. But it will still start to taste stale after a while. If your water tastes stale, aerate it a bit by pouring between a couple of clean containers.
Second, water rotation will keep you aware of what your water storage situation is like. If water is going bad, possibly due to a bad seal or contamination, you will discover the problem before you need to use the water.
When you do rotate the water, try to use the old water where it can do some good, instead of just dumping it down the drain. For example, if you rotate your water during the summer you could empty the old water on your garden beds, trees, or grass. They need to be watered anyway. Then, instead of using fresh water for the plants you can fill your water containers.
That said, if you forget, or choose not, to rotate your water frequently be aware that it probably won’t taste very good. Aerating it can help improve the taste. A pinch of salt might help. As long as the container was properly cleaned and sanitized, the lid has a good seal, and the water is still clear (and doesn't have an odor when you open it), the water should be usable for a long time.
When you do open stored water, check it before you drink or use it for cooking. In my experience there usually isn’t any kind of smell, but if there is don’t drink it. However, it could still be usable. Even if the water does smell bad, or is questionable, you may still be able to filter or sanitize it so it’s safe to drink.
As for where to store water, the best place is in a cool location, out of sunlight.
There is concern about storing water containers directly on cement. The cement could leach chemicals through the plastic, particularly thinner plastic, into the container. The reality is while cement can leach chemicals, it’s unlikely to do so in a cool environment. The leaching is more likely if the cement heats up, like in my garage. Storing water containers directly on the floor of the garage, where temperatures fluctuate could possibly have the leaching effect. However, in the dark, year-round cool of the basement the leaching is less of an issue.
You can probably safely store you water containers on a cement floor, provided the location is out of the sunlight and the temperature is constantly cool. But there are other reasons to keep storage containers off the cement (or other) floor. Personally, I prefer to keep my water storage containers off the floor—on a pallet or blocks of wood. If something spills on the floor, it doesn’t stick to the containers. Keeping the containers off the floor also allows for more air circulation under them.
Another consideration is you do not want the water to freeze. Not that freezing is bad. The problem is water expands when it freezes, and if there is too much water in the container when that happens, the container could burst.
I keep a lot of our water storage in our garage. However, it’s on shelves off the ground and against the wall of the house, which is warmer than the other three (exterior) walls of the garage. In the several years of having water stored there it has never frozen. We used to have a dog kennel in the garage, with an exit to the dog run, and I kept a thermometer near the door. There were times when the dog’s water froze, when the temperatures in that part of the garage dropped to single digits, but the water storage remained liquid. This doesn’t mean the water won’t ever freeze, it just hasn’t yet.
Water Storage Plan
A sample water storage plan could be as follows:
- Commercial bottled water for 3 or more days. This allows you some time to figure things out, get organized after the chaos of the disaster, and begin considering long-term water options.
- Your own bottled water, enough for up to 30 days. After the commercial water is gone, or mostly gone, you can move on to the other water storage. During this time, you need to really consider and implement long-term options. If the infrastructure was severely damaged, you may be months (or longer) without potable water coming through the pipes to your home.
- Long-term water filtration, disinfection, and sanitation solutions. What water sources are available? How will you disinfect/treat the water? How reliable are the various water sources?
Creating and Storing an Emergency Water Supply, CDC
Even without emergency water storage, you should be aware of some potential emergency water sources that are often overlooked. These emergency water sources in your home are not sufficient for even a short term solution, but, depending on the number of people in your home and your actions in the event of an emergency, they could give you a day or more of water.
In an emergency situation, the ideal is to shut off your water main to prevent any contaminated water from infiltrating your home water system.
Shutting off the water main should keep outside, possibly contaminated, water from entering into your home's system. Because it is possible your home's water could have become tainted, it's never a bad idea to boil the water before you drink or use it for cooking.
You can access water from a few different “emergency water sources” in your home. Some are ready-to-drink and other sources need to be treated before using. Two possible ready-to-drink sources are from the water pipes and the water heater tank. I say “possible” because it’s also possible contaminated water from the main could have also contaminated your home’s water system.
Other emergency water sources should be treated, filtered and disinfected, before use. These include toilet tanks, pools, and other water sources such as rainwater, streams, ponds, lakes, or springs.

Emergency Water Source- Water Pipes
Emergency Water Source - Water Heater
Emergency Water Sources - Other
Toilet Tank
Pool
Rainwater Collection
Other Emergency Water Sources
- Rainwater
- Rivers, streams, or other sources of moving water.
- Lakes and ponds.
- Natural springs.
- Don’t use water that has an odor, is dark colored, or has floating material (like oil).
- Don’t drink flood water.
- Don’t use saltwater unless you distill it first.
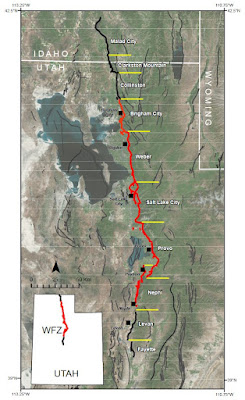


Comments
Post a Comment